Low Carb Grain Free Granola Bars

I found some great grain free chewy granola bars a couple of weeks ago, but they were sweetened with honey and maple syrup, which doesn’t fit very well into my eating plan. I decided to make my own based on my multi-seed cracker recipe and using unsweetened apple sauce to add the chewiness created by the honey and maple syrup.

I used the raw nuts and seeds I had on hand: cashews, walnuts, sunflower seeds, and pepitas along with unsweetened shredded coconut. I think the bars would have been better if I had lightly toasted the nuts and seeds first. I also didn’t like the pepitas in the bars so removed them from the recipe and increased the coconut. You can use any mix of nuts and seeds you like as long as the proportions stay the same. I plan to use almonds rather than cashews next time. For slightly sweeter, more sugar-like flavor 2-4 tablespoons of stevia-erythritol blend can be added.

1 cup unsweetened apple sauce
1 cup chopped walnuts
1 cup chopped cashews
1 cup sunflower seeds
1 cup unsweetened shredded coconut
1/4 cup flaxseed meal
1 egg
2 Tbs ground cinnamon
2 tsp salt
1 tsp stevia extract
1 tsp vanilla extraxt

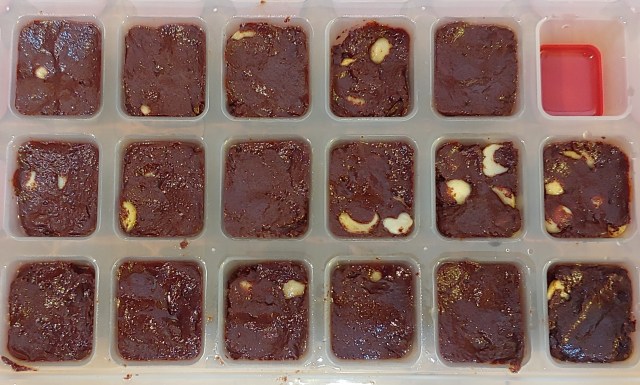
Preheat oven to 350°F. Prepare a quarter sheet baking pan (13″x9″) with a silicone baking mat or parchment paper and oil the sides of the pan with coconut oil. In a medium bowl, add all the dry ingredients. Stir until well-combined and all the nuts and seeds are evenly coated in cinnamon. Add apple sauce, egg, stevia extract, and vanilla extract. Stir until well-combined. Turn the nut and seed mixture out on the prepared baking sheet, spreading it evenly with the back of a spoon or off-set spatula. Press down firmly to pack down the nuts and seeds. With a sharp knife, cut the dough into 16 even sized bars. Bake for 35-45 minutes until the bars are golden brown. Remove from the oven and allow to cool before turning out the bars and breaking them apart. Store in an air tight container for up to a week; refrigerate or freeze for a longer shelf life.

0330191855~3.jpg

Posted in Dairy Free, Gluten Free, Grain Free, LCHF, Snack food, Specialized Diets, Sugar Free | Leave a comment

Dairy Free Sugar Free Chocolate Truffles

This is my second and most successful attempt at making low sugar, dairy free chocolate truffles in the past week. I used Swerve sweetener the first time and didn’t add cocoa butter. They turned out okay, but the erythritol recrystalized upon cooling, giving the chocolate a gritty texture, and the baker’s chocolate was too bitter with just coconut cream and sweetener. The cocoa butter made a huge difference in flavor, making it more like milk chocolate. It also improved the texture, making it as smooth as silk. I probably could have reduced the cocoa butter to 1 ounce and/or the coconut cream to a 1/4 cup; at room temperature the truffles are a little soft, but the flavor is so good I don’t mind.

To sweeten unsweetened chocolate the ratio is 1 tablespoon of sugar per ounce of chocolate. I used the same ratio for cocoa butter. In this recipe I used my favorite brand of stevia-erythritol blend that I powdered in a spice grinder so it didn’t become grainy upon cooling instead of Swerve. Since stevia-erythritol blends are twice as sweet as sugar, I used 3 tablespoons per 6 ounces of chocolate and cocoa butter.

I didn’t temper the chocolate so it doesn’t have that beautiful shine of tempered chocolate. You can find two methods of tempering chocolate at the Ghirardelli website. This recipe has optional macadamia nuts since I had them on hand and I love the combination of macadamia nuts and chocolate; they can be eliminated or substituted with another variety of nut. I plan to make low sugar peanut butter cups with this recipe in the near future. I used an ice cube tray with a silicone bottom sprayed with coconut oil as a mold for these truffles; the chocolate was too soft to roll into balls until it cooled down.

0121191944a~2

4 oz baker’s chocolate, finely chopped
2 oz cocoa butter, finely chopped
3/4 cup macadamia nuts, optional
1/3 cup coconut cream
3 Tbs stevia-erythritol blend, powdered
1 tsp vanilla extract
1/2 tsp salt

Combine all ingredients except nuts in a heat safe bowl or a double boiler. Bring a small pot of water or bottom of a double boiler with 2-3 inches of water in it to a low simmer and place the bowl/pot on top of it; the water should not touch the bottom of the bowl. Stir frequently with a silicone or metal spoon until the chocolate and cocoa butter are completely melted and the texture is smooth. Remove from heat and stir in the nuts. Spoon chocolate mixture into prepared molds. Chill until completely cool before removing from mold. Store in the refrigerator or a cool, dry place.

0127192153_hdr~2

Posted in Dairy Free, Dessert, Gluten Free, Grain Free, LCHF, Snack food, Specialized Diets, Sugar Free, Vegan | Leave a comment

No Bake Non-Dairy Tahini Cheesecake

I based this recipe on the Knox gelatin no bake It’s a Snap Cheesecake recipe that has been popular in my household(s) for over 40 years. To make the recipe as easy as possible, I used commercial tahini (sesame paste) and plain nom-dairy yogurt. I used Kite Hill brand almond yogurt, but there are many other brands available. I suspect that cashew butter would be a good alternative to tahini, but I couldn’t find any locally. Since I also follow a low sugar, grain free diet I used Swerve sweetener, which measures 1:1 ratio with sugar, and made a faux graham cracker crust. It would be easy to adapt this recipe to use real sugar and graham crackers rather than my alternatives. Agar agar powder can also be used in place of gelatin for those who follow a vegan diet. To obtain coconut cream, refrigerate a can of full fat coconut milk overnight, open the can, and scoop out the thick coconut cream that has separated from the water. If using a springform pan, rub the sides of the pan with coconut oil and line with parchment paper to ensure clean removal of the pan from the cheesecake.

This cheesecake is very rich so I cut it into 12 pieces rather than the usual 8. I served it with low sugar cherry pie filling and coconut non-dairy topping. I think it would also be excellent with chocolate ganache.

0114191658~2

Low Carb Faux Graham Cracker Crust

1 cup almond flour or meal
1/2 cup unsweetened shredded coconut
6 Tbs coconut oil, melted
2 Tbs Swerve sweetener
1 tsp molasses (optional)
1/2 tsp salt

Preheat oven to 375°F. Add dry ingredients in a 9 inch pie pan or a small mixing bowl for a 10 inch springform pan and whisk until well-combined. Add melted coconut oil and molasses. Mix ingredients together with a fork until the oil and molasses are evenly combined with the dry ingredients. Press the crust in the bottom of a springform pan or the bottom and sides of a pie pan using an offset spatula, the back of a spoon, or the bottom of a measuring cup. Bake the crust for 10-12 minutes, until lightly browned. Remove from the oven and let cool.

No Bake Non-Dairy Tahini Cheesecake

3/4 cup tahini
3/4 cup plain non-dairy yogurt
3/4 cup boiling water
1/2 cup coconut cream
1 envelope Knox gelatin
6 Tbs Swerve sweetener
2 Tbs lemon juice
1 tsp vanilla extract
1 tsp salt
1/2 tsp almond extract (optional)

In a mixing bowl add tahini, yogurt, coconut cream, lemon juice, flavoring extracts, and salt. Beat with an electric mixer until smooth. In a small bowl, whisk together Swerve sweetener and gelatin. Add boiling water and whisk until all the gelatin has dissolved. Slowly pour the gelatin mixture in with tahini mixture, mixing on low until well combined. Pour the cheesecake into the prepared crust and refrigerate uncovered for 30-60 minutes before covering to reduce condensation. Chill for 4-6 hours before serving.

Posted in Dairy Free, Dessert, Gluten Free, Grain Free, LCHF, Specialized Diets, Sugar Free | 2 Comments

Unkosher Chopped Liver with Bacon

I love traditional chopped liver with schmaltz and gribenes (chicken fat & crispy chicken skin) and usually use this recipe. I picked up chicken livers the other day, but forgot to ask the butcher for chicken skin and fat so I could make those two important flavor components. Instead of returning to the store, I pulled a package of pork jowl bacon from my freezer and used it instead. Any type of bacon can be used in this recipe as long as it’s cooked extra crispy.

Instead of chopping the liver by hand, I usually pulse it in the food processor to save both energy and time. While the onions are cooking I boil, cool, and peel the eggs. For an additional layer of flavor you can deglaze the pan with a few ounces of red wine before cooking the onions, if desired.

My favorite way to eat chopped liver is with slices of a tart apple, though it’s also good with multi-seed crackers or as a spread in lettuce wraps. Yesterday I had it in banh mi inspired lettuce wraps with marinated pork, cucumber, pickled carrots, cilantro, and green onion.

1 1/2 lbs chicken livers, cleaned & trimmed
6 oz bacon, diced
4 eggs, hard boiled & peeled
1 medium onion, diced
1 tsp salt
1/2 tsp black pepper

In a large saute pan over medium heat add the diced bacon and cook until crispy, stiring frequently. Remove the bacon bits from the pan and reserve the fat. Return approximately 2 tablespoons of bacon fat to the pan and add the diced onions. Reduce heat to medium-low and cover for 10 minutes. Uncover and stir just often enough the onions don’t stick until the onions are caramelized, about 20-30 minutes. Boil, cool, and peel the eggs and trim the livers while the onions are cooking. Remove the onions from the pan and add another 2 tablespoons of bacon fat to the pan and add the chicken livers. Cook until the livers are brown on the outside and slightly pink in the center; do not over cook the livers. Combine the cooked livers, hard boiled eggs, bacon, onions, salt, pepper, and any pan drippings to a food processor. Pulse in 30 second increments until rough chopped. Spoon the chopped liver into a bowl or storage container, seal, and refrigerate. Serve once cold.

Posted in Dairy Free, Gluten Free, Grain Free, LCHF, Main Course, Side Dish, Snack food, Specialized Diets | Leave a comment

Low Sugar Sweet & Spicy Pickled Carrots

Recently I’ve been too busy to cook every day so I make a pork roast seasoned simply with black pepper and smoked salt and eat roasted pork for a week or so. This has lead to some creative uses of leftover pork. My current favorite is Asian inspired Savoy cabbage wraps with Asian plum sauce, pickled carrots, cilantro, and green onion; sometimes I also add cucumber. Savoy cabbage leaves, when cut down the center and the heavy center vein removed, are tender and flavorful. I also love the crunchiness they add to the wraps. I use the canned homemade Asian plum sauce from this recipe and pickle my own carrots.

20181202_175722-1

To make the quick pickled carrots I used pre-cut matchstick carrots instead of julienning carrots myself; shredded carrots can also be used. I prefer julianned carrots for texture and appearance. I used seasoned rice wine vinegar and homemade red jalapeno chili sauce because that’s what I had on hand; Thai chili sauce or red chili flakes can be used. Allulose or granulated sugar can be used in place of erythritol.

10oz matchstick/julienned carrots
2 cups rice wine vinegar + extra to top off jars
1/4 cup erythritol
2 Tbs fresh ginger, finely grated
2 garlic cloves, finely grated
4 tsp salt
2 tsp Thai chili sauce

Sterilize one quart or two pint canning jars; this can be easily done in a dishwasher. Loosely pack the jar(s) with julianned carrots. If using pre-packaged carrots, rinse them well in cold water and white vinegar before adding them to the jar(s). In a small pot, combine vinegar, erythritol, ginger, garlic, salt, and chili sauce. Bring to a simmer and stir until the salt and erythritol is dissolved. Simmer for approximately 5 minutes and then pour the hot vinegar mixture over the carrots, dividing the ginger, garlic, and peppers between two jars if using more than one. If the carrots aren’t completely covered, top the jar(s) off with additional vinegar. Cover the jar(s) and refrigerate. The carrots are ready to eat once chilled.

1205181149~2

Posted in Condiments, Dairy Free, Gluten Free, Grain Free, LCHF, Side Dish, Snack food, Specialized Diets, Sugar Free, Vegan | 1 Comment

Dairy Free Alfredo Sauce

I finally had in depth functional medicine GI tests done and discovered that besides SIBO I had H. pylori. Oddly, once the H. pylori was cleared up with antibiotics, my dairy sensitivity returned. Now I’m back on on dairy free diet and once again experimenting with cheese substitutes.

I made a faux Alfredo sauce (fauxfredo) with cashew yogurt and sesame paste to go with spaghetti squash for lunch the other day & it turned out surprisingly well. It would also be good as a faux cheese sauce over steamed vegetables, as a nacho cheese substitute, a spread on sandwiches or wraps, and as a cheese fondue substitute.

1/2 cup dairy free plain yogurt
1/4 cup tahini
1 Tbs Shiro miso paste
1 Tbs nutritional yeast powder
1/2 tsp granulated garlic
1/4 tsp white pepper
1/4 tsp salt
dash of cayenne pepper (optional)

Add ingredients to a small sauce pot on medium low heat. Whisk together until smooth and heated through, about 5-7 minutes. Serve over pasta or vegetables or use chilled as a faux cheese spread.

Posted in Dairy Free, Gluten Free, Grain Free, LCHF, Sauces, Specialized Diets, Vegan | 1 Comment

Offal Dirty Cauliflower Rice

I seem to be on a mission to adapt every savory rice dish that pops in my head to a low carb, grain free cauliflower version. Today I experimented with dirty rice. My version is offal forward because I have a lot of it in my freezer. Traditionally pork sausage or ground beef and chicken liver or chicken gizzards are used. I skipped the pork or beef in favor of chicken liver, hearts, and gizzards but it would be easy to adapt this recipe to fit your tastes and available ingredients.

I simmered the hearts and gizzards in seasoned water for approximately 30 minutes while I was prepping the vegetables before straining them and grinding them in the food processor. I also quickly pan seared the liver in bacon fat before pureeing them in the food processor. Precooking the offal makes assembly of the whole dish easier and faster.

I made my own creole seasoning from herbs & spices I had on hand. I used a teaspoon as 1 part when making it since 3 tsp = 1 Tbs. Salt can be reduced or eliminated, but I prefer it with the salt to balance out the heat. I’m looking forward to using it on pork and fish dishes.

Creole Seasoning

6 parts salt (optional)
6 parts sweet paprika
3 parts granulated garlic
3 parts granulated onion
2 parts cayenne pepper
1 part black pepper
1 part white pepper
1 part dried oregano
1 part dried parsley
1 part dried thyme

Combine all ingredients in a small bowl and whisk together until well combined. Store in a sealable glass spice or canning jar.

Offal Dirty Cauliflower Rice

1 head cauliflower, riced or grated (3-4 cups)
1 lb chicken livers
1/2 lb chicken hearts, cooked & ground
1/2 lb chicken gizzards, cooked & ground
4 cloves garlic, minced or pressed
3 green onions, sliced
2 carrots, diced small
2 stalks celery, diced small
2 bay leaves
1 onion, diced
1 bell pepper, diced small
1 jalapeno, finely diced
1/4 cup fresh parsley, minced
2 Tbs bacon fat or lard
2 Tbs creole seasoning (see above)
1 Tbs chicken bouillon (optional)
2 tsp fresh thyme leaves

Rinse, clean, and dry chicken livers. In a large sauté pan melt bacon fat or lard on medium high. Add livers to the sauté pan. Cook for approximately 2 minutes on each side, so they’re still rare in the center. Remove from the pan and set aside. Add onion, garlic, celery, carrots, bell pepper, and jalapeno to the pan. Reduce heat to medium low and saute the vegetables until the onions are translucent and the carrots and celery are partially cooked. Add the ground gizzards and hearts, cauliflower, bay leaves, creole seasoning, fresh thyme, and bouillon. Stir well and cook until the vegetables are cooked through. Puree the livers in a food processor or chop finely. Remove the bay leaves from the pan and add liver, parsley, and green onions. Stir until well combined. Remove from heat and serve.

Posted in Dairy Free, Gluten Free, Grain Free, LCHF, Main Course, Side Dish, Specialized Diets | Leave a comment

Low Carb Shrimp & Vegetable Pad Thai

I love Pad Thai but since becoming sensitive to rice it’s been off my menu. Then I discovered tamarind pods in the produce section of my local Walmart and decided to make my own rice-free, low carb version. I shelled the pods, soaked them in hot water, removed the seeds, and strained the remaining sauce to remove the fibers. It’s a little thinner than tamarind paste, but works well in Pad Thai sauce as long as I cook down the sauce.

I’ve made several batches of shrimp Pad Thai, twice with low carb tofu shirataki fettuccine style noodles and once with sweet potato “noodles.” Ribbons of carrots or zucchini are also options, though in my opinion the shirataki noodles work best because they have little flavor on their own and a texture similar to rice noodles. The best suggested way to prepare regular shirataki noodles is to drain and rinse them well in a colander, boil them in water for 2-3 minutes, drain and cook them in a hot dry pan for several minutes to remove most of the water. With the tofu shirataki noodles, I drain and rinse them well in colander under cool water and pat them dry with paper towels before adding them to my Pad Thai.

Banana flowers are a traditional vegetable in Pad Thai; artichoke hearts are a good substitution for them. I buy frozen artichoke hearts and defrost them in the refrigerator before adding them in dishes. Other options are baby bok choy or Brussel sprouts.

Pad Thai sauce has pretty simple ratios: 1 part palm sugar, 1/2 part tamarind paste, 1/4 part fish sauce, plus salt. Making it low sugar & low carb changes those ratios quite a bit, though I’ve also made it with wildflower honey rather than palm sugar & it was amazing. Coconut sugar could also be used to preserve the ratios if you’re not too concerned about carbohydrates. My recipe below uses a combination of stevia-erythritol blend, stevia extract, & molasses. The stevia-erythritol blend doesn’t dissolve as well as it should when used alone and the molasses gives it an extra depth of flavor similar to palm sugar. Be aware that tamarind reacts to metal, so use glass or plastics when storing it.

Low Sugar Pad Thai Sauce

1/2 cup tamarind paste
1/4 cup fish sauce
1/4 cup stevia-erythritol blend
1 tsp salt
1/2 tsp stevia extract
1/2 tsp molasses

Combine all ingredients in a non-reactive bowl or jar. Stir until well-combined. Unused portions can be refrigerated or frozen for later use.

2018-06-21 18.26.23.jpg

Low Carb Shrimp and Vegetable Pad Thai

12-16 large raw shrimp, deveined & peeled
2 7-8oz packages of tofu shirataki noodles
2 eggs, beaten
6 oz artichoke hearts, quartered
6 oz snow peas, diced
6 oz bean sprouts
2 carrots, diced
4 green onions, sliced
3 cloves garlic, minced or pressed
1/2 cup low sugar Pad Thai sauce (recipe above)
2 Tbs avocado oil
1 Tbs red pepper flakes
Garnishes:
lime wedges
peanuts, roasted and chopped
green onion

Marinate shrimp in avocado oil, garlic, and red chili flakes in the refrigerator for 2-6 hours. In a large sauté pan pour out the shrimp marinade and heat on medium have until the garlic is sizzling. Add shrimp in a single layer. Cook each side of the shrimp until pink and no longer translucent, about 2 minutes. Use tongs to turn and remove cooked shrimp from the pan. Set shrimp aside. Add Pad Thai sauce and carrots to the pan. Cook until the carrots are partially cooked. Drain, rinse thoroughly, and dry the tofu shirataki noodles. Add the noodles, artichoke hearts, and snow peas to the pan. Use tongs to cover the noodles in sauce and distribute the vegetables. Cook until most of the liquid is gone and the artichoke hearts and carrots are cooked through. Add the beaten eggs, toss with tongs until cooked through. Remove from heat and add green onion, bean sprouts, and shrimp. Thoroughly combine the Pad Thai with tongs. Serve with wedges of lime, chopped peanuts, and green onion as garnish. Makes approximately 4 servings.

Posted in Dairy Free, Gluten Free, Grain Free, LCHF, Main Course, Specialized Diets, Sugar Free | Leave a comment

Coconut Cashew Cauliflower Rice

I made this cauliflower rice dish to go with Thai green curry. It’s missing the acidic element of my cilantro lime cauliflower rice, but it offers more of a textural difference. Toasting the coconut shreds is optional.

1 head cauliflower, grated or finely chopped (3-4 cups)
3 green onions, sliced
1 cup unsweetened coconut shreds
1/2 cup toasted cashews, chopped
2 Tbs full fat coconut milk
1 Tbs coconut oil
2 tsp salt
1 tsp white pepper (optional)

In a large sauté pan combine coconut oil and coconut milk and heat on medium high until melted. Add cauliflower, coconut shreds, salt, and white pepper. Sauté until the cauliflower is cooked through, 10-15 minutes. Remove from heat and stir in the green onion and cashews. Serve with Indian, Southeast Asian, South American, or Caribbean dishes as an alternative to coconut rice.

Posted in Dairy Free, Gluten Free, Grain Free, LCHF, Side Dish, Specialized Diets, Vegan | 1 Comment

Almond Parmesan Crusted Oven Fried Chicken

I made a version of this recipe earlier this week, only I tried pan frying the chicken before finishing it in the oven. Pan frying didn’t work as most of the breading fell off the chicken. I re-worked the recipe for oven frying instead. I’ve had good luck with oven frying other traditionally pan fried foods. The trick is spraying the breaded chicken with cooking spray. I use avocado or coconut oil cooking spray, though olive oil spray would work just as well.

I used the thighs, legs, and wings from a home raised chicken, but increased the ingredients to include the breasts in the recipe below. I recommend using bone and skin-on pieces of chicken for moisture and flavor. Baking times will change for boneless chicken pieces, though temperatures remain the same.

I made sour milk from heavy cream and lemon juice to replace buttermilk. Buttermilk can be used if it’s available to you. Plain whole milk yogurt is another option. Grated Parmesan cheese can be ground fine in a food processor if necessary.

20180627_210518-1

I served my pan fried and then baked chicken with almond flour and cheddar biscuits (recipe from the low carb/keto book “Eat Rich, Live Long”), and a green salad.

8 pieces chicken
2 eggs, beaten
1 1/2 cups heavy cream
3/4 cup almond flour
3/4 cup finely grated Parmesan cheese
1 Tbs lemon juice
1 tsp dried thyme or Italian seasoning
1 tsp salt
1/2 tsp ground cayenne pepper
Avocado or coconut oil cooking spray
Salt & black pepper

Liberally salt and pepper chicken pieces and place in a shallow bowl or pan with pieces not overlapping. Mix together heavy cream and lemon juice and pour over the chicken. Roll the chicken in the sour milk mixture until coated. Cover and refrigerate for 2-8 hours. Once chicken has marinated for desired length of time, preheat oven to 350°F. Prepare a half sheet pan (18″x13″) with foil and a wire rack. Spray the rack with cooking spray to reduce sticking. In a shallow bowl or pan, beat two eggs together with a couple tablespoons of marinade. In another shallow bowl or pan, whisk together almond flour, finely ground Parmesan cheese, salt, herbs, and cayenne pepper. Dip chicken pieces in the egg and then dredge in the seasoned flour and cheese mixture. Set each piece of breaded chicken skin side up on the wire rack prepared baking sheet. Once each piece of chicken is on the baking sheet, liberally spray the top of the chicken with avocado or coconut oil cooking spray. Bake on the middle rack of the oven for 60-75 minutes, until the chicken is golden brown and a thermometer inserted near the bone of the chicken reads at least 165°F for the breasts and 170°F for the thighs. Remove from the oven and serve.

Posted in Gluten Free, Grain Free, LCHF, Main Course, Specialized Diets | Leave a comment